
We are Android clients, and we are a spoiled cluster. Android is such an adaptable, portable OS, to the point that our Android gadgets regularly go about as our own genies giving our everyday versatile wishes, making some of our portable dreams work out as expected. Also, as capable as OEM-gave genies as of now may be, an undertaking control and assignment robotization application, for example, Tasker just increases their energy severalfold.
Most people describe Tasker as a task control and task automation app. But, I see more than that. It's an Android programming application for complete noobs like me and for cutting edge clients with involvement in Android programming. Be that as it may, rather than startling you with lines of code, Tasker gives you a chance to utilize a well disposed interface, which, at its crucial level, gives you a chance to make small Android applications that make your offering.
To figure out how to utilize Tasker comprehensively is past the extent of this post. Rather, in this post, you'll take in the fundamentals of utilizing Tasker to program your Android phone or tablet to do things that you need it to do as per guidelines that you indicate. (Looking for a video tutorial? Hop right ahead to our video guide toward the end of this post.)
Tasker terms
In the first place, we should deal with the terms in Tasker. A hefty portion of the ideas might be unfamiliar to you, and they can be somewhat overpowering, particularly to amateurs. In any case, once you get the rationale of Tasker, you'll see that it's a genuinely effective application notwithstanding to programing noobs.
- Action — The essential component of Tasker. It alludes to phone or tablet capacities and elements that perform something or conveys the phone to a specific state. Tasker bolsters more than 200 activities gathered into 21 classifications.
- Task — A gathering of activities. Generally connected to a trigger or "context", yet can likewise be a free-drifting, standalone undertaking executed physically. A Task can keep running inside another errand. You can clone, fare, import, and bolt Tasks.
- Context — Situations or conditions which, when genuine, trigger the execution of the task(s) connected with it.
- Profile — Some kind of "compartment" or "bundle" for context(s) and connected task(s). You can characterize a few connections for a solitary profile, and every one of those conditions must be valid for the connected Tasks to run.
- Variable — A name for an obscure word that can change after some time, similar to the battery level or the date.
- Scene — A uniquely designed UI. You can make your own particular format of catches, menus, popups, and other UI components.
- Project — A gathering of profiles, errands, scenes, and variables. Every project has its own particular tab (at the base of the principle screen) with a client characterized project name. You can likewise fare or import projects. You can even fare a custom task as a standalone Android application (APK): simply tap on the project name/symbol, select Export, and pick "As App."
Figuring out Tasker’s UI
Tabs and Modes
In spite of the fact that I discover Tasker's components and general UI to some degree complex and certainly scaring to an easygoing client or a newcomer to Android, the tabs on the fundamental screen are somewhat clear as crystal.
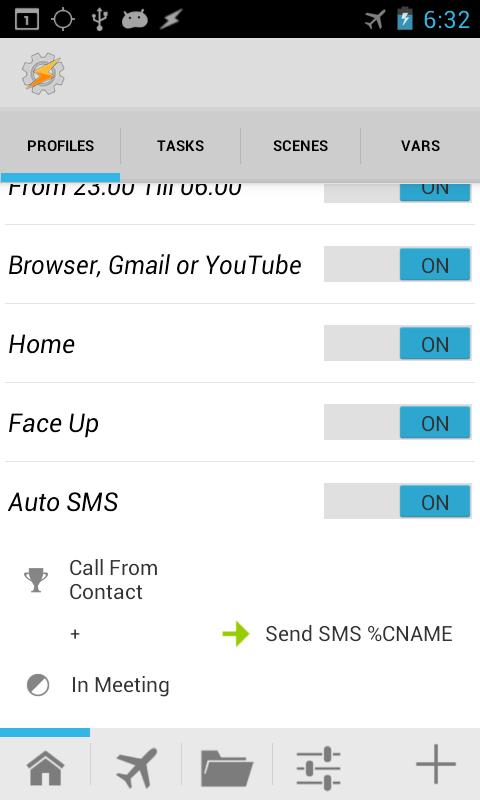
Freshly installed, Tasker's interface indicates three tabs naturally — Profiles, Tasks, and Scenes. The default interface is set up for amateurs and learners (i.e., Beginner Mode).
This default UI looks somewhat not quite the same as non-beginner mode. For example, in Beginner Mode, you can discover three buttons at the base line of all tabs: Search, Add, and Help. At the point when Beginner Mode is incapacitated, these three buttons are replaced by the default project tab (represented to by a Home icon) and the Add button, in addition to at the top column of tabs you get a fourth tab named Vars (i.e., for variables).
Easily switch to “advanced” mode by unticking "Beginner Mode" on the UI tab on Tasker's Preferences page.
Tapping on a main tab's name (aside from the Vars tab) on the main screen opens a menu with buttons for importing files and for setting the sort order for that tab.
Project Tabs
In "advanced" mode (i.e., with Beginner Mode disabled), tapping the default project tab opens a menu with button named Add, Import, Rename, Set Icon, and Lock/Unlock.
The Add button gives you a chance to make another project, which will have its own particular tab. The Import and Export button, obviously, let you share your Tasker project records to others, or use files created by others. You can also assign custom icons to your project tabs.
By the way, it’s easy to protect your projects by setting a lock code; when prompted, just type your lock code in order to view and edit a project.
Main Menu
Tasker's main menu offers commands and options that help you utilize and oversee how the application functions. Access the principle menu via the capacitive Menu key or the virtual Menu button (three specks symbol) at the upper-right corner of the screen. You’ll find these on the menu:
- Browse Examples — redirects you to a list of pre-made illustration profiles, which you can download and import to Tasker.
- Data — for clearing, backing up, or restoring backed up data.
- Info — contains information about the application and how to utilize it.
- Preferences — opens the Preferences page (more about this in the following segment).
- Enable/Disable Tasker — enables or disables Tasker.
- Search Tasker — search data or feature within the app; not available in Beginner Mode.
- Exit — shuts the application.
- Run An Action — performs a single action (e.g. maximizing screen brightness)
- Run Log — records events and procedures done through the application.
- Developer Options — advanced options for devs; not available in Beginner Mode.
Preferences
Tasker’s preferences and options reflect the flexibility of the app. To some people, this can be truly discomfiting, but to those with elevated understanding, this actually shows what Tasker and Android are all about — freedom and flexibility.
Beside many of the options on the Preferences screen, you’ll see big question marks. These can offer relief if you start to scratch your head about what an option might be for. However, some of the help tips are clouded in developer or programmer language, and an idiot like me may need some time to completely digest the info.
Tasker's configuration options are assembled into four tabs. You can modify the application's UI by means of the UI tab. On the Monitor tab, you can set individual preferences for the application's monitoring behavior when the display is either off or on.
On the Action tab, you can set values for camera delay, task execution priority for widgets or shortcuts, displaying warnings and/or errors, and maximum number of queued tasks. On the Misc tab, you can specify how long to keep backups, whether to allow other apps to run tasks, and debugging options.
In the next post, we will learn about:
In the next post, we will learn about:
- Actions and Tasks
- Named and Unnamed tasks
- Importing/Exporting Tasks
- Delete a task or action
- Rearranging actions in a task
- Running a task manually